Level up your expertise with this WordPress how-to guide and learn how to find and work with the core elements of your website.
In our first post in this series, we covered five basic WordPress functions and provided a fundamental understanding of where things are in WordPress. Next you can level up your expertise with this post and learn how to find and work with the core elements of your website.
Locating the Main Menu of Your Website in WordPress
One disclaimer we will always note is that the dashboard you see in WordPress will look different depending on the theme you’re using. That’s because some themes will import custom options on top of the default ones in WordPress. In the case of the main website navigation, we’ll show you where it typically resides for most WordPress sites. For some with a robust theme, even if you click in the usual place to access the header, it may take you to a new menu, specific to the theme, but how you get there is the same.
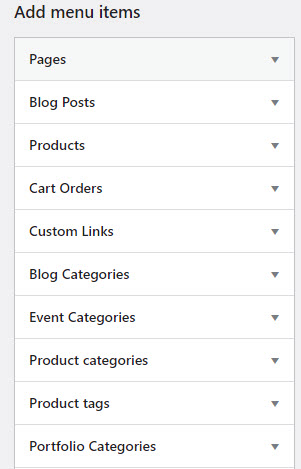
Modifying your site menu(s) is made quite easy in WordPress. Go to the Appearance tab on the left side of your dashboard, and then choose Menus. You will see your site menu as it currently stands, under Menu Structure. You can easily drag and move menu items, according to the order in which you want them to appear.
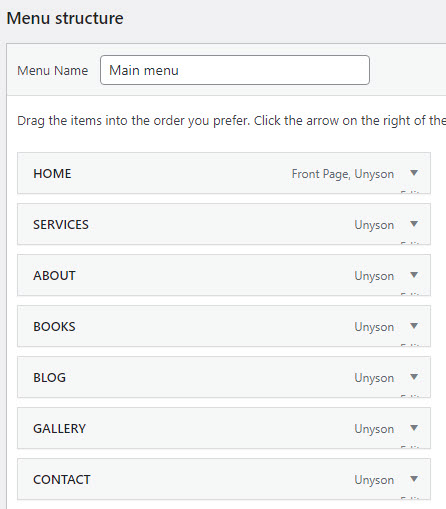
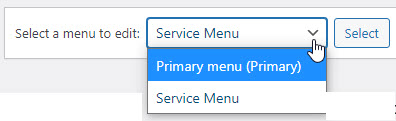
If you have more than one menu on your website, they will show in a drop down so that you can choose the one you want to work on. For example, some websites have a main menu, a slightly different menu in the footer, as well as a side menu appearing on certain pages.
To add new items to your menu, you have many options and can get creative. You can not only add menu links to pages of your site, but also to certain products or product categories (if you have that set up in a plugin like WooCommerce), blog categories, and more.
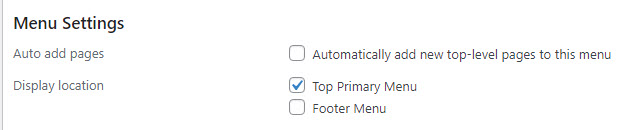
Additionally, pay attention to the Menu Settings section near the bottom. Check to ensure that the checkbox options are displaying the menus the way you want them. For instance, you usually wouldn’t want your same top menu to be duplicated in the footer.
Modifying Your WordPress Header Design
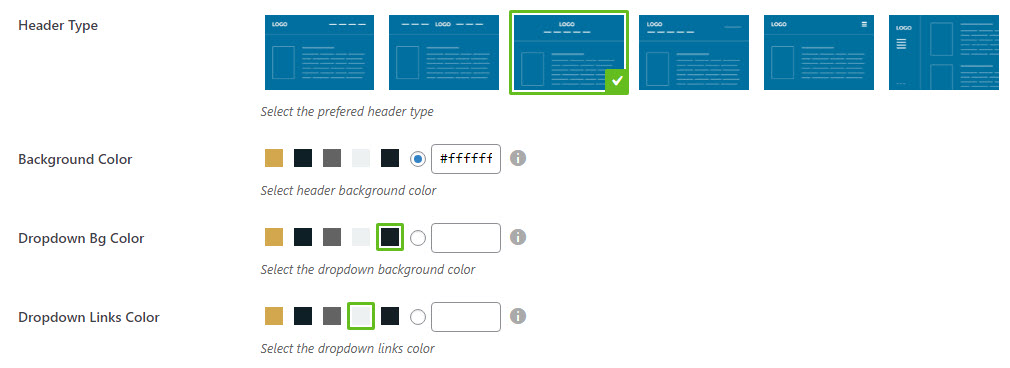
Your header is different than your site menu. When we talk about the website header we mean all of the elements involved that make the top portion of your website look the way it does, such as:
- Whether your logo appears, or just text with your company name
- The font, color, and size of text
- Type/style/layout
- Background color
- Whether the header is sticky (stays at the top as the page is scrolled)
- Social icons
- Search box
Access these header settings under Appearance, Theme Settings, Header. The settings are relatively robust as far as what you can customize. See the example below.
Accessing the Footer
You’ll find the footer through Appearance, Theme Settings, Footer, and find a lot of the same settings as you saw in the Header. The footer is usually where you want to place your site’s copyright, the current year, special icons such as seals or certifications, or perhaps you want to place your social media icons in the footer.
You can also modify the number of columns in your footer, the background color, and decide whether or not you want a unique menu or a logo to appear there.
View Your WordPress Theme
If you need to know which theme you have installed, go to Appearance, Themes, and you will see the current active theme. If you have more than one theme showing, and if you know you’re never going to use an inactive theme again, you could ask your developer to remove it to improve site speed and simplify your dashboard.
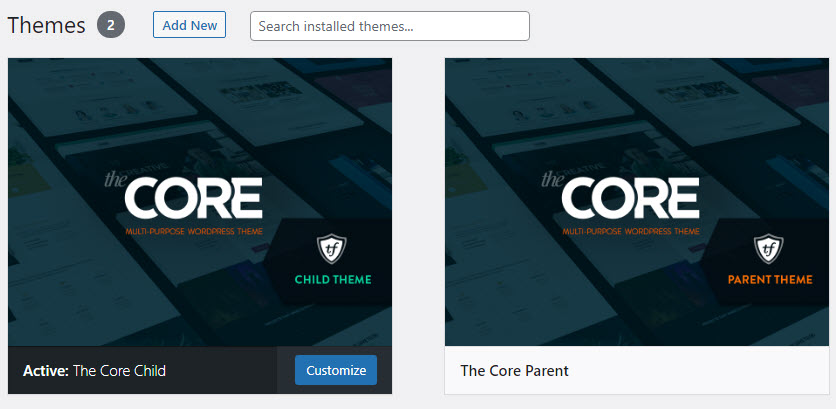
What Are Parent and Child Themes?
The parent theme is the main theme that provides and handles all the features, functionalities, and the style. A parent theme doesn’t need a child theme to work, but child themes require a parent theme because they inherit part of the parent files.
A child theme works as an additional layer on top of the parent theme. This allows your WordPress developer to modify or add a theme, or remove features, without worrying about losing your customizations. It’s best practice to modify the child theme when it comes to adding extra features or style to a theme.
Theme Settings
In the same place that you found the header and footer settings you will find a variety of customizable settings surrounding your theme. Under Appearance, Theme Settings, you can adjust:
- General settings such as scrolling options, website background color/image, content density, and more
- The layout and style of your blog pages, comments, and other general settings for your blog
- The colors used on your site, including the color for links and buttons. You can input hex color numbers.
- The typography used on your site, including the header tags, body text, and buttons
- The custom Cascading Style Sheets (CSS). Warning: only an experienced developer should make changes here.
Backup Your Site, Then Experiment
If you’re going to be making significant changes to your site, or even just playing around and testing, you’ll want to first ensure that your site is backed up frequently in case you mess something up and need to revert to the previous version. A good WordPress hosting and maintenance partner will be doing this automatically, nightly. Additionally, your hosting/maintenance company can potentially create what’s called a development environment, a copy of your site on the backend that you can experiment and make changes within, without affecting the live site.